Howler Backend Active Admin - Data Capture
 Updated
by Robyn Marais
Updated
by Robyn Marais
One of the benefits of choosing Howler as your ticketing platform is access to user information and data.
One way to do this is to ask extra questions for ticket registration using our data capture feature.
This information can be really helpful to collect emergency contact and medical aid information for active events.
For an overview of Active Admin, please refer to this Help Doc.
To set up extra data capture you'll need to add questions under the questions tab.
Once your questions are loaded, you can add questions to your tickets or pre-registration before promoting your event.
Create data capture questions
- Navigate to the "Questions" tab on Active Admin
- Select the question type you would like to create

Text Question
Use when you need to get a written response.
- Select 'New Text Question'.

- Enter the 'Text' for the question.
- Enter the 'Max Length' to limit the amount of characters a customer can type.
- Selecting 'Multi Line' will allow the the text to be entered in paragraphs or with line breaks.
- Select 'Create Text Question'.

Number Question
Use when you need to get a number response.
- Select 'New Number Question'.

- Enter the 'Text' for the question.
- Set the 'Min' & 'Max' to restrict the number range of an answer.
- Select 'Create Number Question'.

Boolean Question
Use when you need to get a 'yes' or 'no' response.
- Click on the 'New Boolean Question' button.

- Enter the 'Text' for the question.
- Select 'Create Boolean Question'.

Multiple Choice Question
Use when you want the customer to select one specific answer from a list.
- Select 'New Multiple Question'.

- Enter the 'Text' for the question.
- Click on 'Add Option' to create a select-able answer, repeat at least once.

- Select 'Create Multiple Choice Question'.

Multiple Answer Question
Use when you want the customer to select multiple answers from a list.
- Select 'New Multiple Answer Question'.

- Enter the 'Text' for the question.
- Enter the 'Min' amount of answers select-able.
- Enter the 'Max' amount of answers select-able.
- Select 'Add Option' to create a select-able answer, repeat at least once.

- Click on the 'Create Answer Choice Question'.

Date Question
Use when you want to get a selected date response.
- Select 'New Date Question'.

- Enter the 'Text' for the question.
- Enter the 'Start Date' for the range.
- Enter the 'End Date' for the range.
- Select 'Create Date Question'.

Cellphone Number Question
Use when you want to get a cellphone number response.
- Select 'New Cellphone Number Question'.

- Enter the 'Text' for the question.
- Click on the 'Create Cellphone Number Question' button.

ID Number Question
Use when you want to get an ID number response.
- Select 'New ID Question'.

- Enter the 'Text' for the question.
- Set the 'Minimum Age Requirement' to not allow anyone below that age to be able to purchase a ticket.
- Set the 'Maximum Age Requirement' to not allow anyone above that age to be able to purchase a ticket.
- Select 'Date to check ages' to select the date from which it checks.
- Select 'Create ID Number Question'.
Link Questions to your Tickets
To add data capture questions you'll need to create a ticket type or pre-registration event.
Find instructions on adding data capture questions to a pre-registration event here.
To link questions to your ticket type;
- Navigate to your event on Active Admin
- Within the "Tickets & Registration" box, select the "Ticket Types" tab.
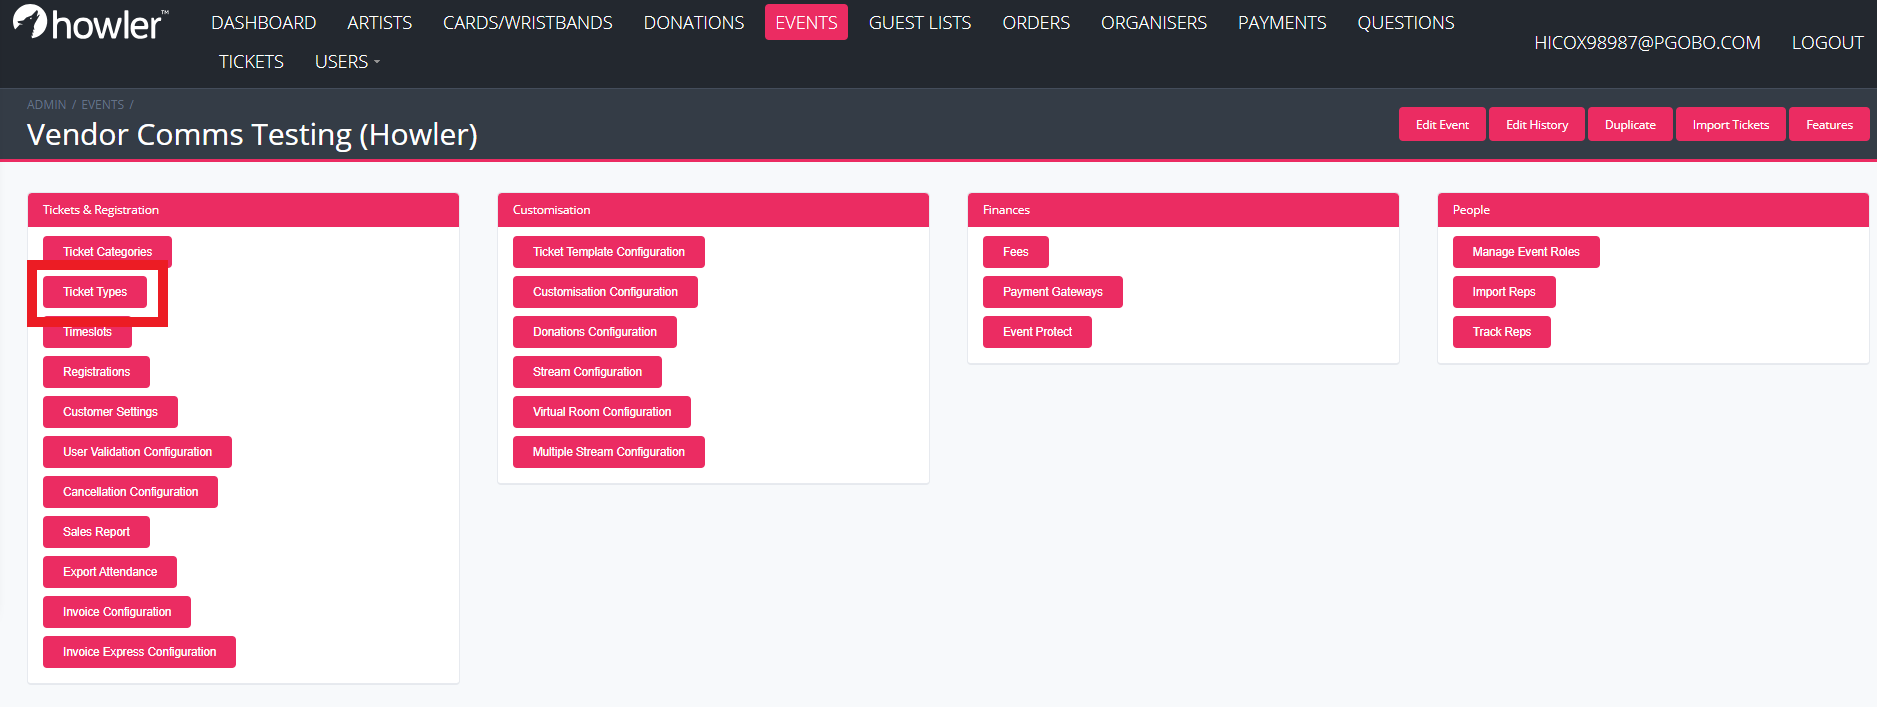
- Next to the appropriate ticket type, select 'View'.

- Select 'Questions'.

- Select "Add Question"
- Select the dropdown and search for your pre-created question, one at a time.
- Select the required checkboxes to configure your customer journey.
The checkboxes:
- Is required - Select this if this should be required to allow customers to view and download tickets
- Ask after purchase - This will be asked after the purchase journey rather than during the purchase journey
- Allow edit - Allows customers to edit their answers after completing registration
- Ask purchaser when sharing - This will require the purchaser to answer this question
- Hidden - Will hide a question as these cannot be deleted once answers have been collected
- Requires unique answer - Will not allow customers to have the same answer as another user
- Allow answer to repopulate - This is used if the same question is used across different event. This answer can be pre-poluated from the previous answer for the same user.
- Depends on question - This is where you can create question dependancies to create different customer journeys. Select the question that should split the flow.
- Depends on value - Select the desired answer that will split the flow.
When you're happy with your questions, you can buy a test ticket to test the customer journey.
Answers to these questions will be visible in your attendance export.