Howler Backend Active Admin - Create a Pre Registration Event
 Updated
by Robyn Marais
Updated
by Robyn Marais
One of the benefits of choosing Howler as your ticketing platform is access to customer data.
You can generate hype for your ticket launch as well as build a marketing list and understand your audience better by creating a pre-registration event for your customers to sign up to receive exclusive access and notifications of your first phase ticket sales.
You can promote your pre-registration event ahead of your ticket launch to gather customer data and interest. We recommend a pre-registration period of 1-2 weeks.
Remember to use our marketing tools to send out an email and/or sms to these customers to direct them to your ticket launch when tickets become available to buy.
For an overview of Active Admin, please refer to this Help Doc.
Setup a pre-registration event
There are a few steps to take to create a pre-registration event;
- Create a guest list
- Create an event in Active Admin
- Link the guestlist to the event
- Test and Go Live
Create a guestlist
You'll need to create a guest list for customers to sign up to as there will be no ticket types created to link the customers to the event.
- At the top of Active Admin, navigate to the "Guest List" tab.
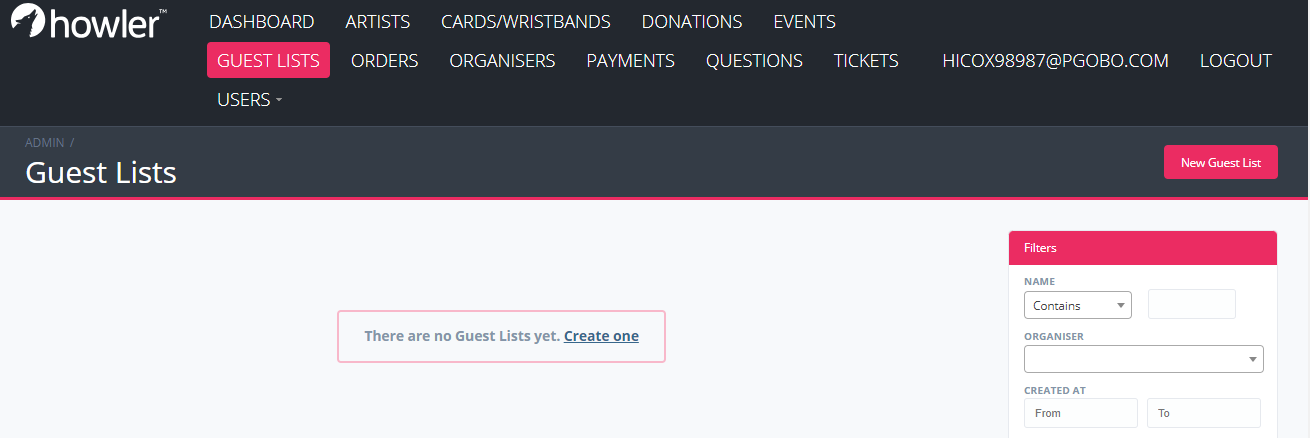
- Select "New Guest List"
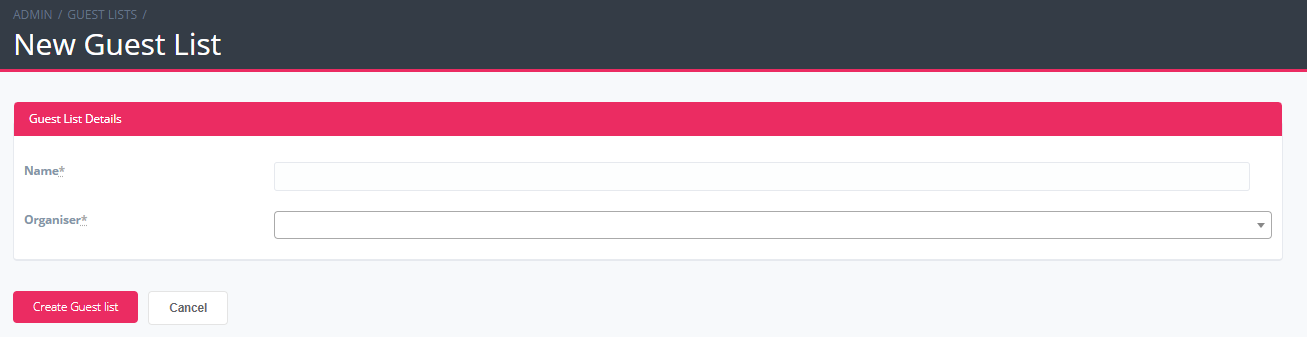
- Enter the Guest List Name. This needs to be distinguishable for your event.
- Select the organiser profile that the event will be created on.
- Select "Create Guest List.
You now have a Guest List and will need to create an event to link it to.
Create an event on Active Admin
You can create an event in the Organiser Portal however you will not be able to go live without a ticket type and will need to edit your event within Active Admin to launch your pre-registration event.
We generally recommend using the Organiser Portal for the initial event setup as it is more intuitive but it is possible to start from Active Admin.
- Navigate to the "Events" tab at the top of Active Admin
- Select New Event

- Complete the event details fields as required.
If you're unsure, create a test event to play around with or email clientsupport@howler.co.za for clarity.
Required fields;
Name - Give your pre-registration a descriptive name that includes your event name.
Status - Come back to this when you've completed your setup, previewed and are happy with the pre-registration event.
Start time & End time - Use the time period that the pre-registration event will be live.
Time zone - Select the time zone of the event.
Organiser - Select the organiser profile that the main event will be linked to.
Header Image - Select an eye catching and informative event header image that will display on the pre-registration event. This can be your event poster.
Category - Select a category for your event.
Source - Always select "Howler"
Venue - Your event venue
URL (Short URL) - This is a shortened URL that should be catchy and memorable for Pre-Registration link promotion.
- Select "Create Event"
Now that you have an event and a guest list, you'll need to link these together.
Link your Guest List and Event
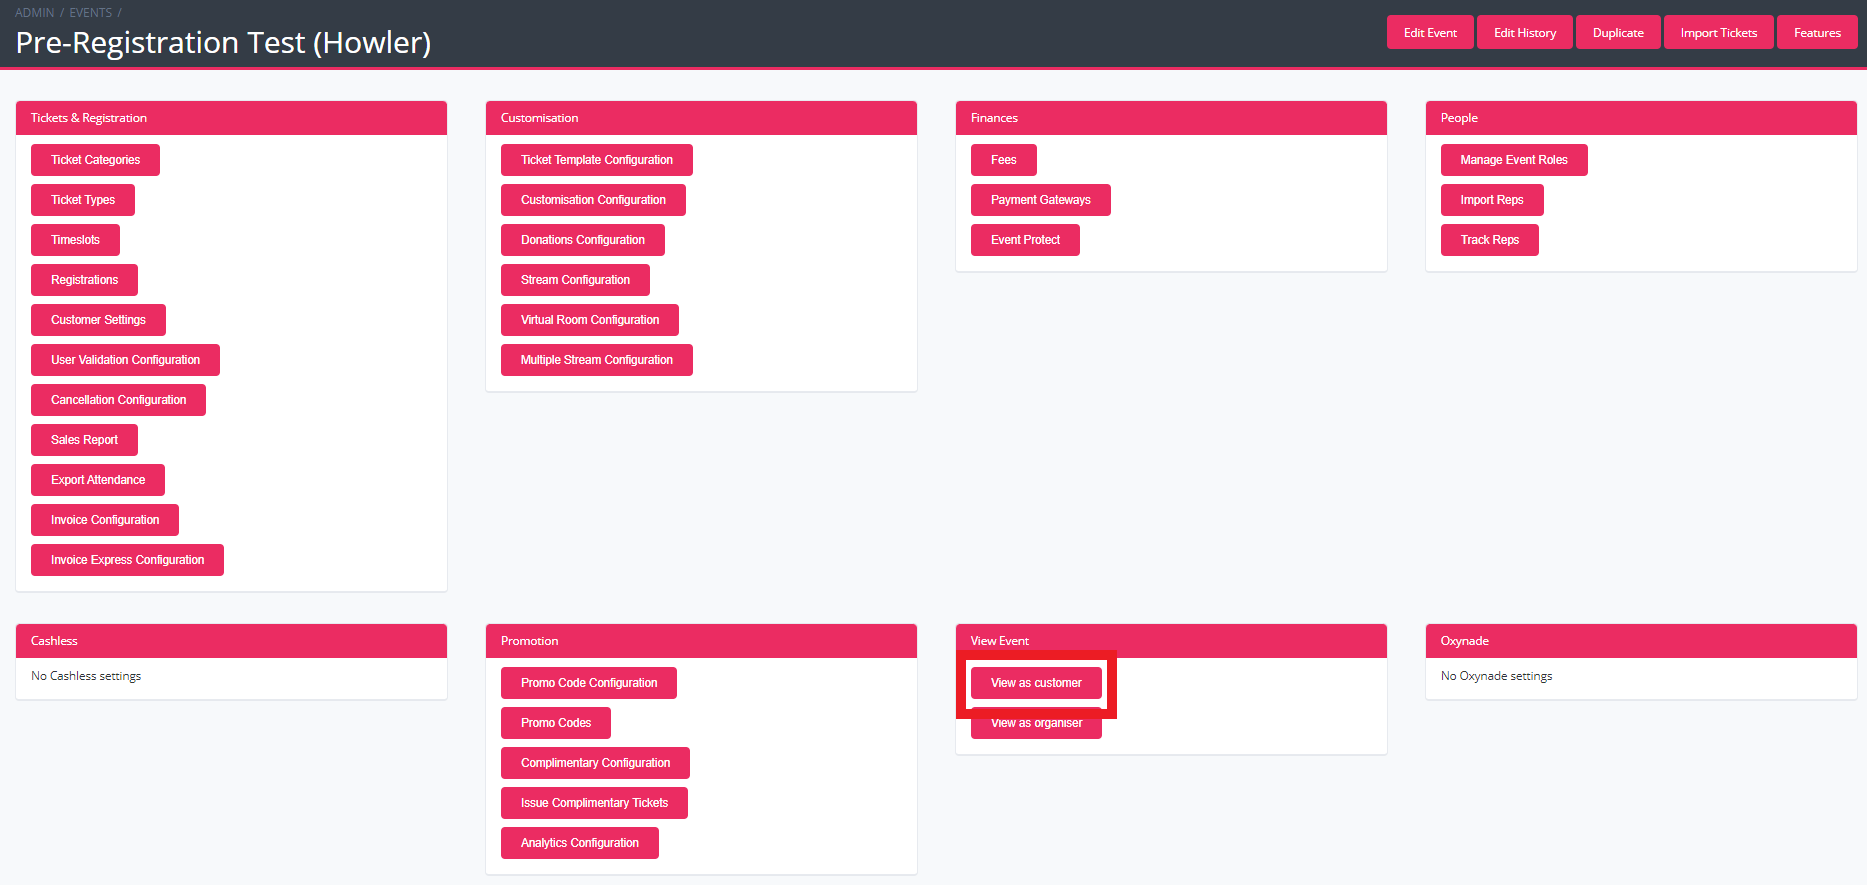
- Navigate to your event within Active Admin
- Within the "Tickets & Registration" box, select "Registrations"
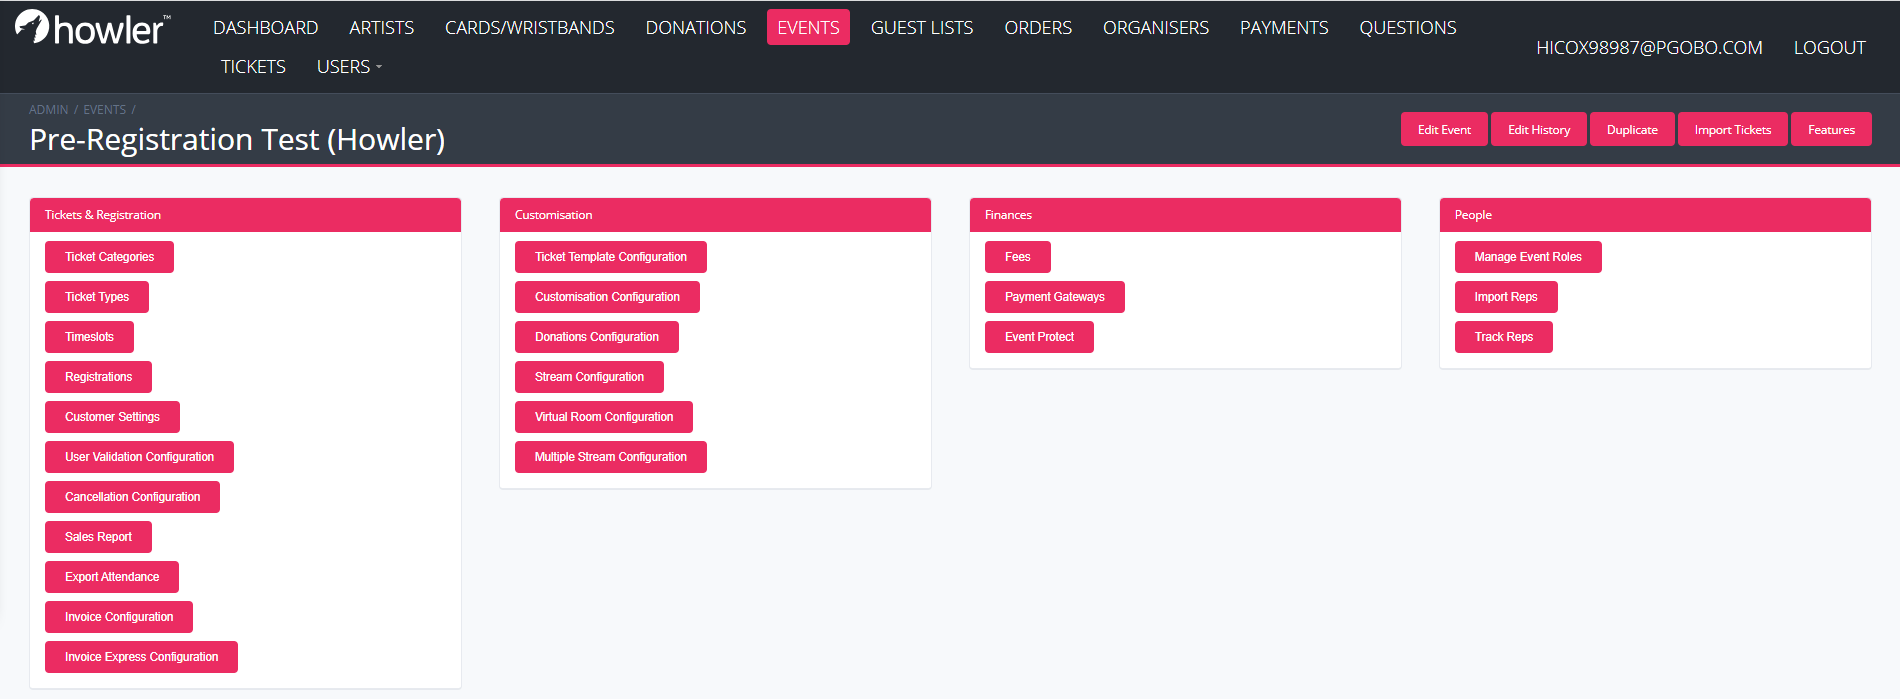
- Select "New Registration"
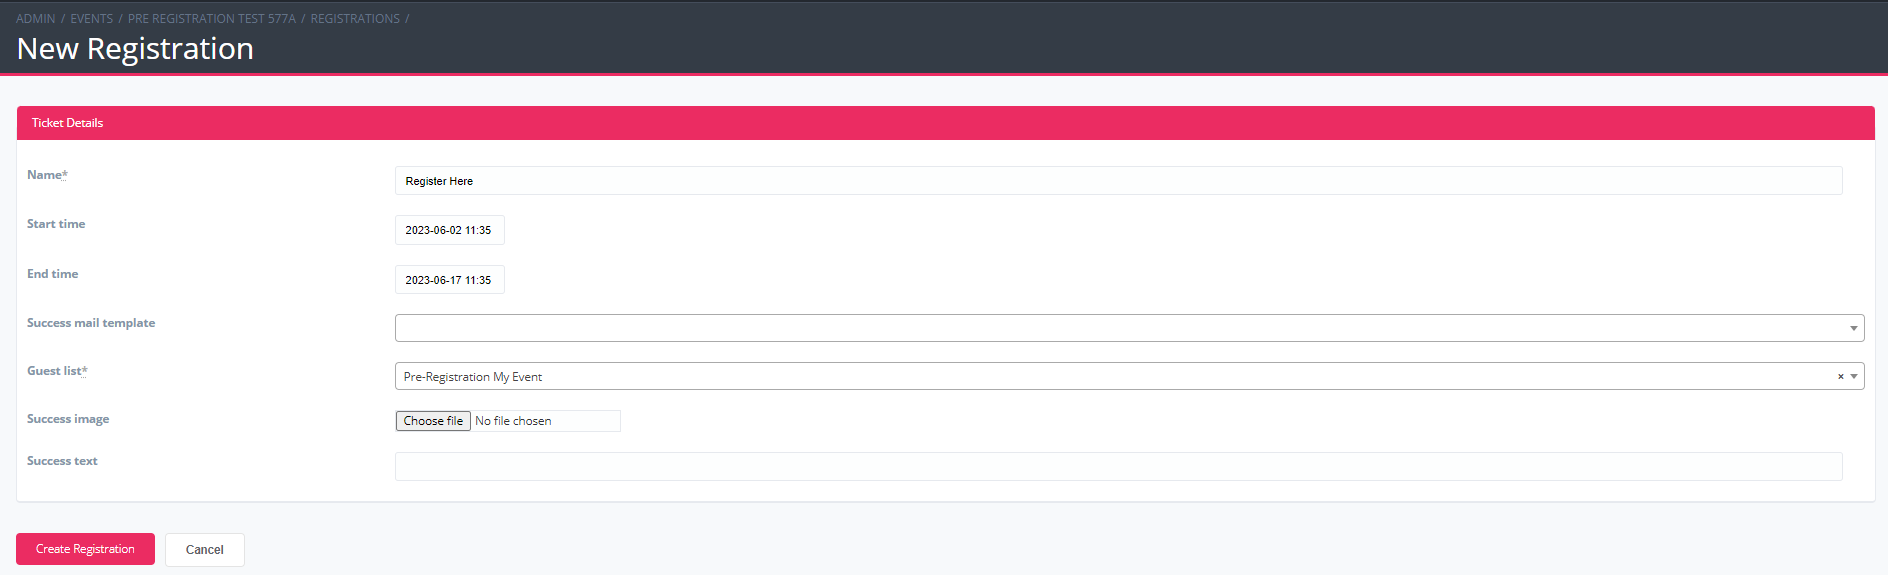
- Enter the Registration Name
- Complete the start time and end time
- Select the "Guest List" that you had previously created.
- Select "Create Registration
Now your guest list is linked to your event and you are able to test the customer journey and go live with your pre-registration event.
Test and Go Live
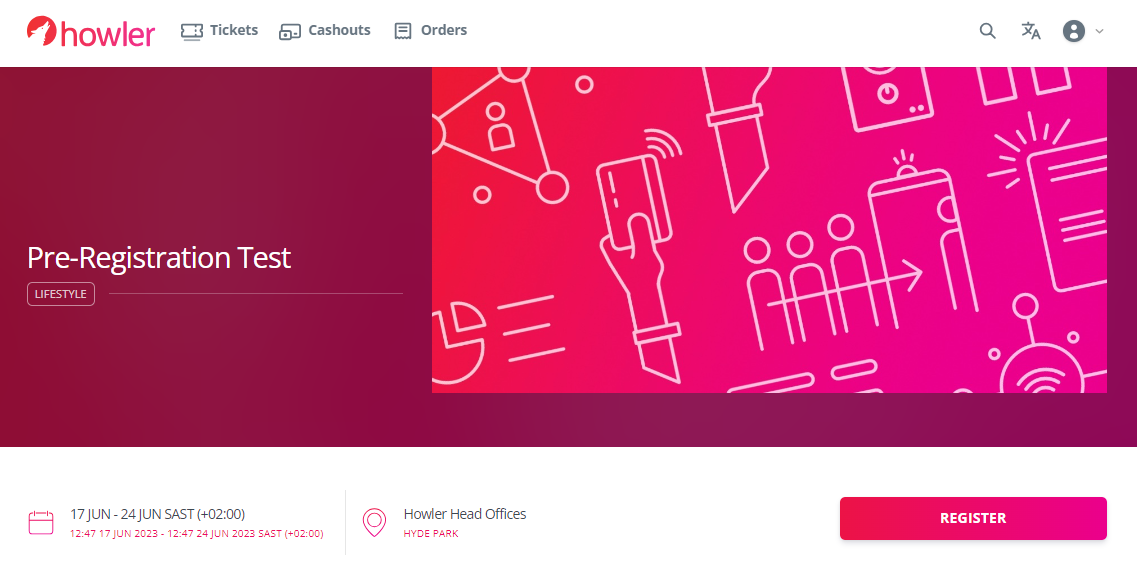
- Navigate to your customer-facing event page.
- Within your Event on Active Admin, select "View as Customer"
- Or within the Organiser Portal, select "Preview"

- Complete the customer registration to make sure you're happy with the customer journey.
- Launch your event
- Navigate back to your event on Active Admin and select "Edit Event"
- Select "active" as the ticket status within the event details.
- Scroll to the bottom and select "Update Event"
Now that you've created your pre-registration, you can promote your pre-registration link.
When customers begin to register, you'll be able to view and manage your customer information as well as use the Marketing Tools on the Organiser Portal to send promotional content.
View and manage guest lists
- Within Active Admin, navigate to the "Guest List" tab.
- Select "view" on the guest list that you'd like to manage.
- Here you can edit guest list, view guests, add data capture questions, view responses to those question, add guests and upload guests.

Add Questions to a Pre-Registration event
If you'd like to collect additional information on your customers, you could add data capture to your pre-registration, you'll need to add questions under the questions tab.
Once your questions are loaded, you can add questions to your pre-registration before promoting your link.
- Within Active Admin, navigate to the "Guest List" tab.
- Select "view" on the guest list that you'd like to manage.
- Select "Questions"

- Select "Add Question"
- Select the dropdown and search for your pre-created question, one at a time.
- Select the required checkboxes to configure your customer journey.
The checkboxes:
- Is required - Select this if this should be required to allow customers to view and download tickets
- Ask after purchase - This will be asked after the purchase journey rather than during the purchase journey
- Allow edit - Allows customers to edit their answers after completing registration
- Ask purchaser when sharing - This will require the purchaser to answer this question
- Hidden - Will hide a question as these cannot be deleted once answers have been collected
- Requires unique answer - Will not allow customers to have the same answer as another user
- Allow answer to repopulate - This can be used if the same question has been asked across different events or ticket types. This will automatically populate the answer of this question to the customer's responses from a previous event or ticket type.
- Depends on question - This is where you can create question dependencies to create different customer journeys. select the question that should split the flow.
- Depends on value - Select the desired answer that will split the flow.
When you're happy with your questions, you can complete the customer registration to test the customer journey.
Answers to these questions will be visible under your "Guest List" settings.